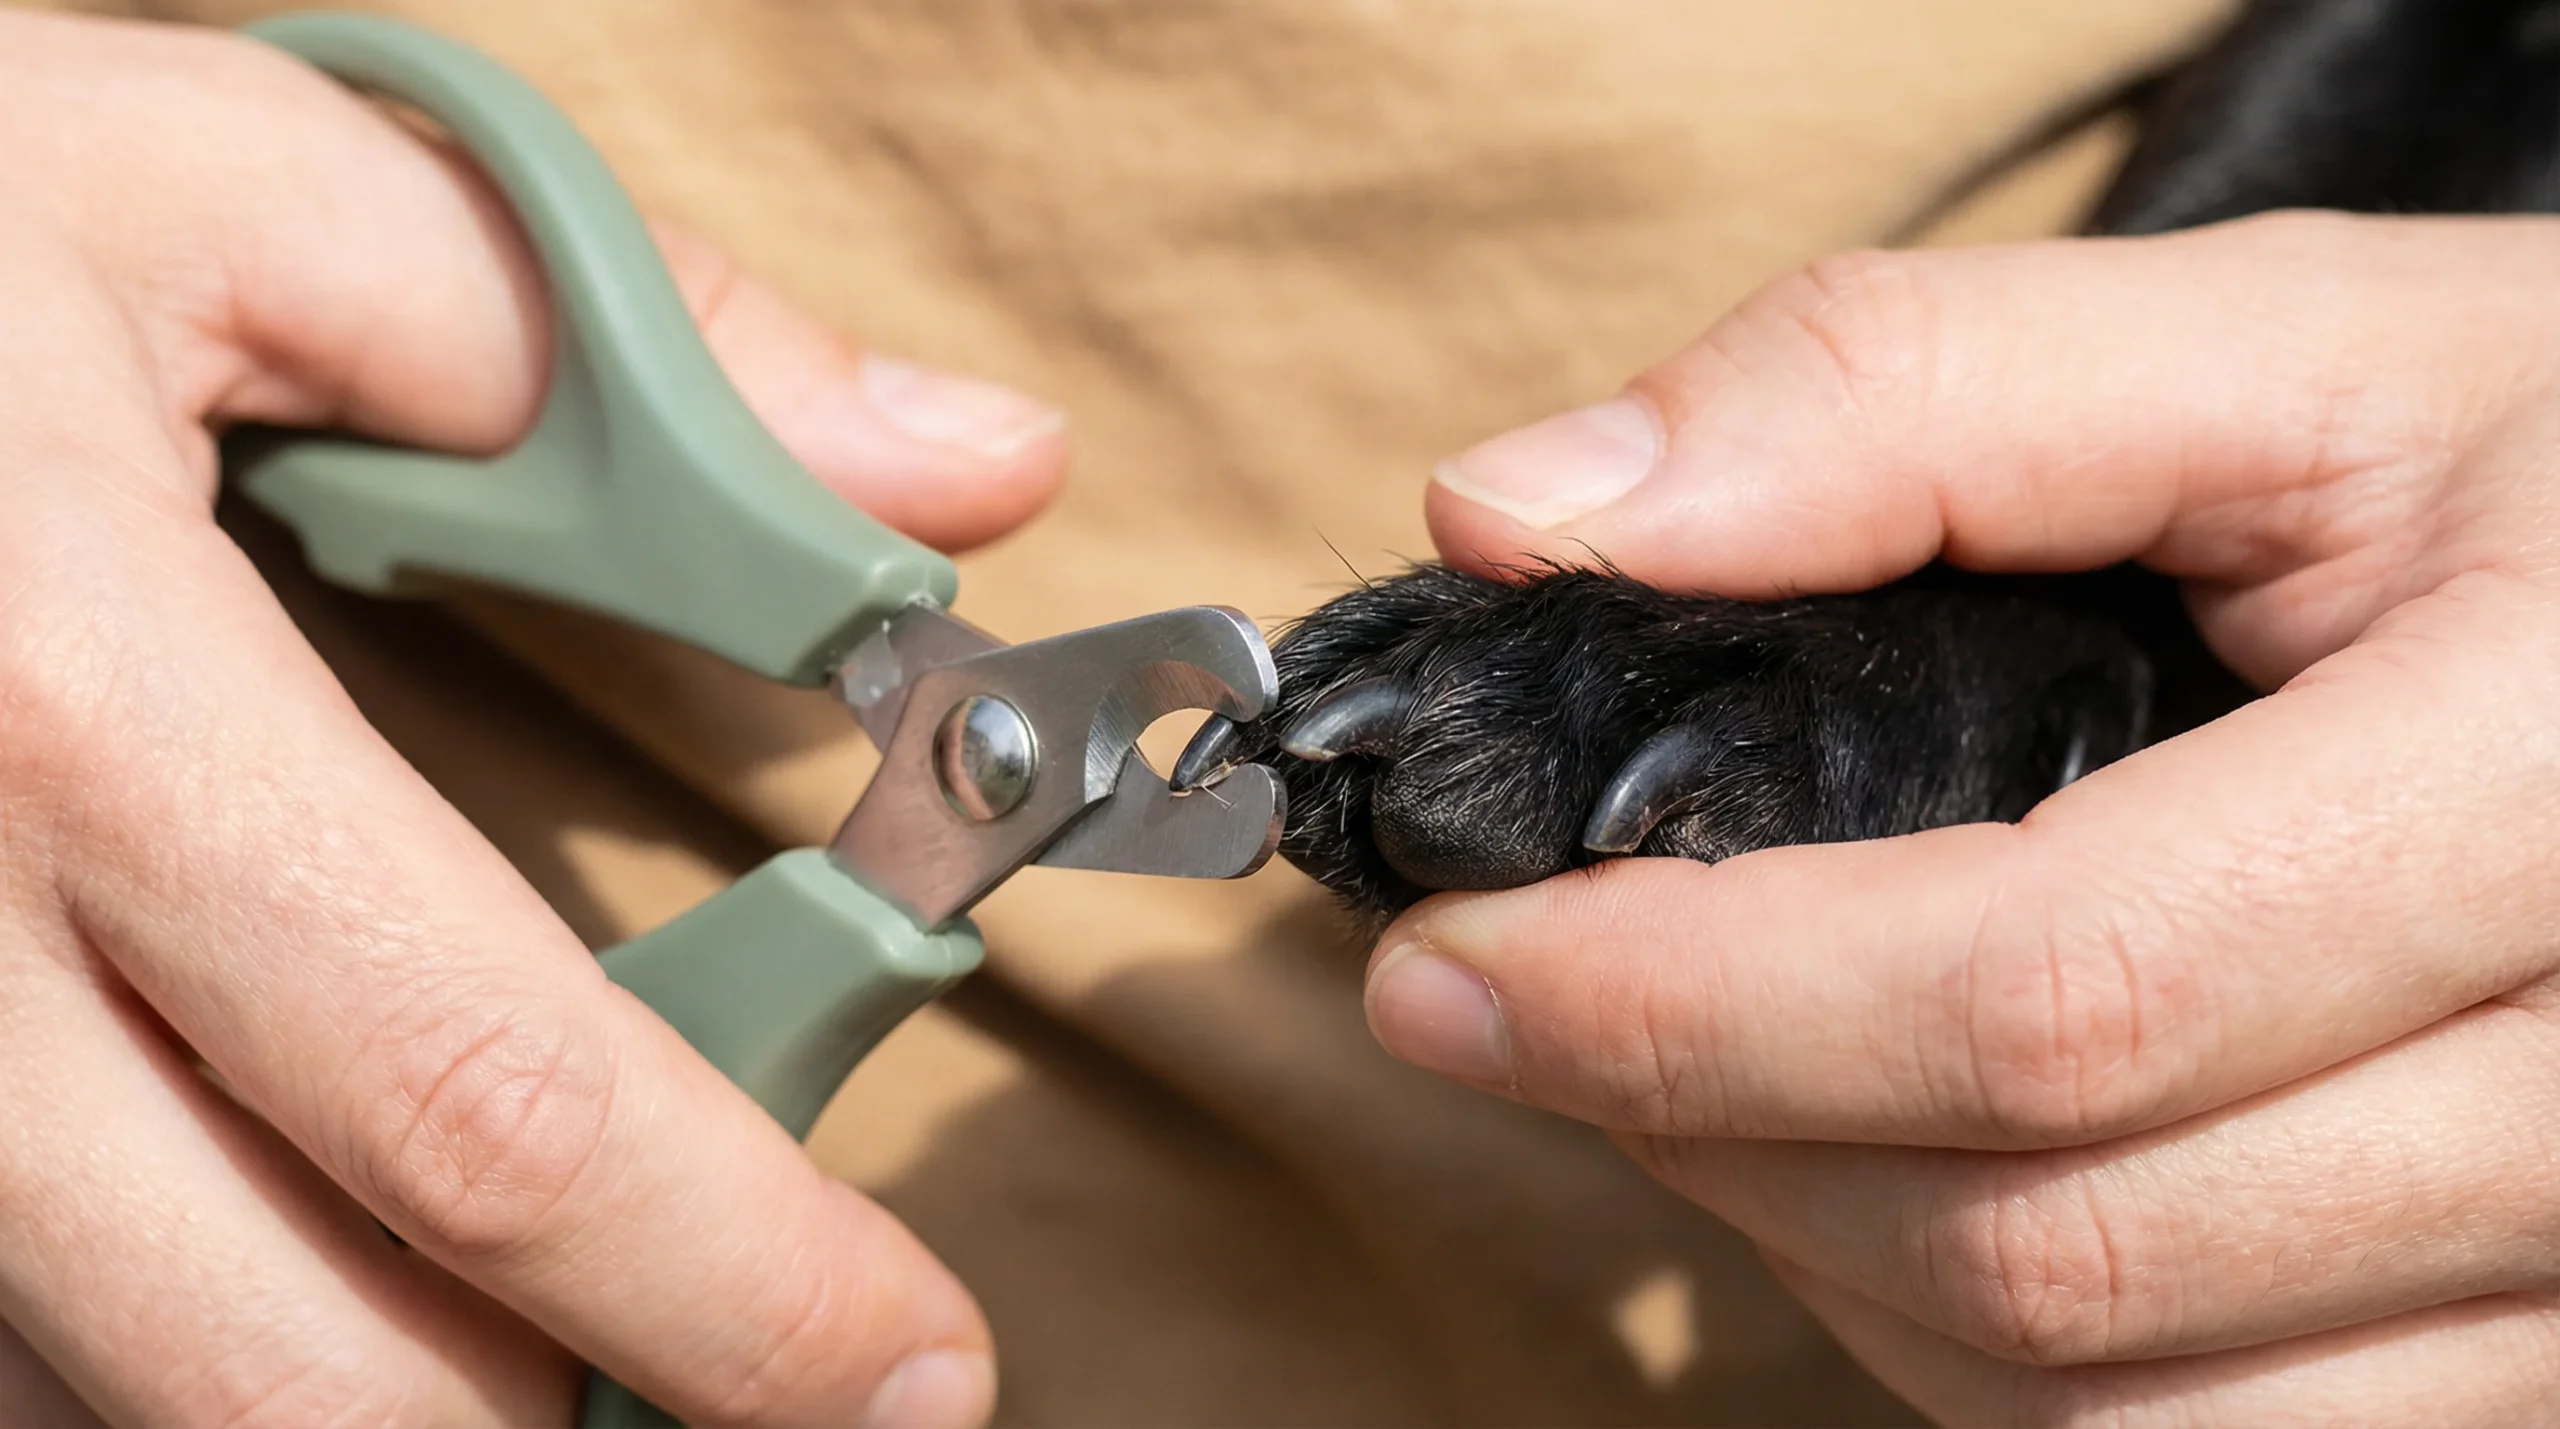
If you’re searching for how to cut dog nails that are black, you’re not alone. Black nails are harder to trim safely because the quick is not visible, which can make many dog owners anxious about causing pain or bleeding.
The good news? With the correct technique, tools, and patience, you can cut black dog nails safely at home. This guide walks you through everything step by step — from understanding nail anatomy to what to do if you accidentally cut the quick.
Quick Look: Cutting Black Dog Nails Safely
- Trim small amounts at a time (1–2 mm)
- Cut at a 45-degree angle
- Watch for the grey or chalky centre
- Stop immediately if you see dark dots or pink tissue
- Always keep styptic powder nearby
If your dog’s nails are overgrown or growing unusually fast, you may still need occasional trimming — see our guide on how often to clip a dog’s nails to avoid discomfort and long-term issues.
TABLE OF CONTENTS
Why Black Dog Nails Are Harder to Cut
Black dog nails hide the quick, which is the sensitive inner tissue containing blood vessels and nerves. On light-coloured nails, the quick is visible as a pink area. On black nails, it’s hidden — increasing the risk of accidental cuts.
This doesn’t mean black nails are more dangerous to trim — they just require more precision and patience.
Dog Nail Anatomy (What You Need to Know)
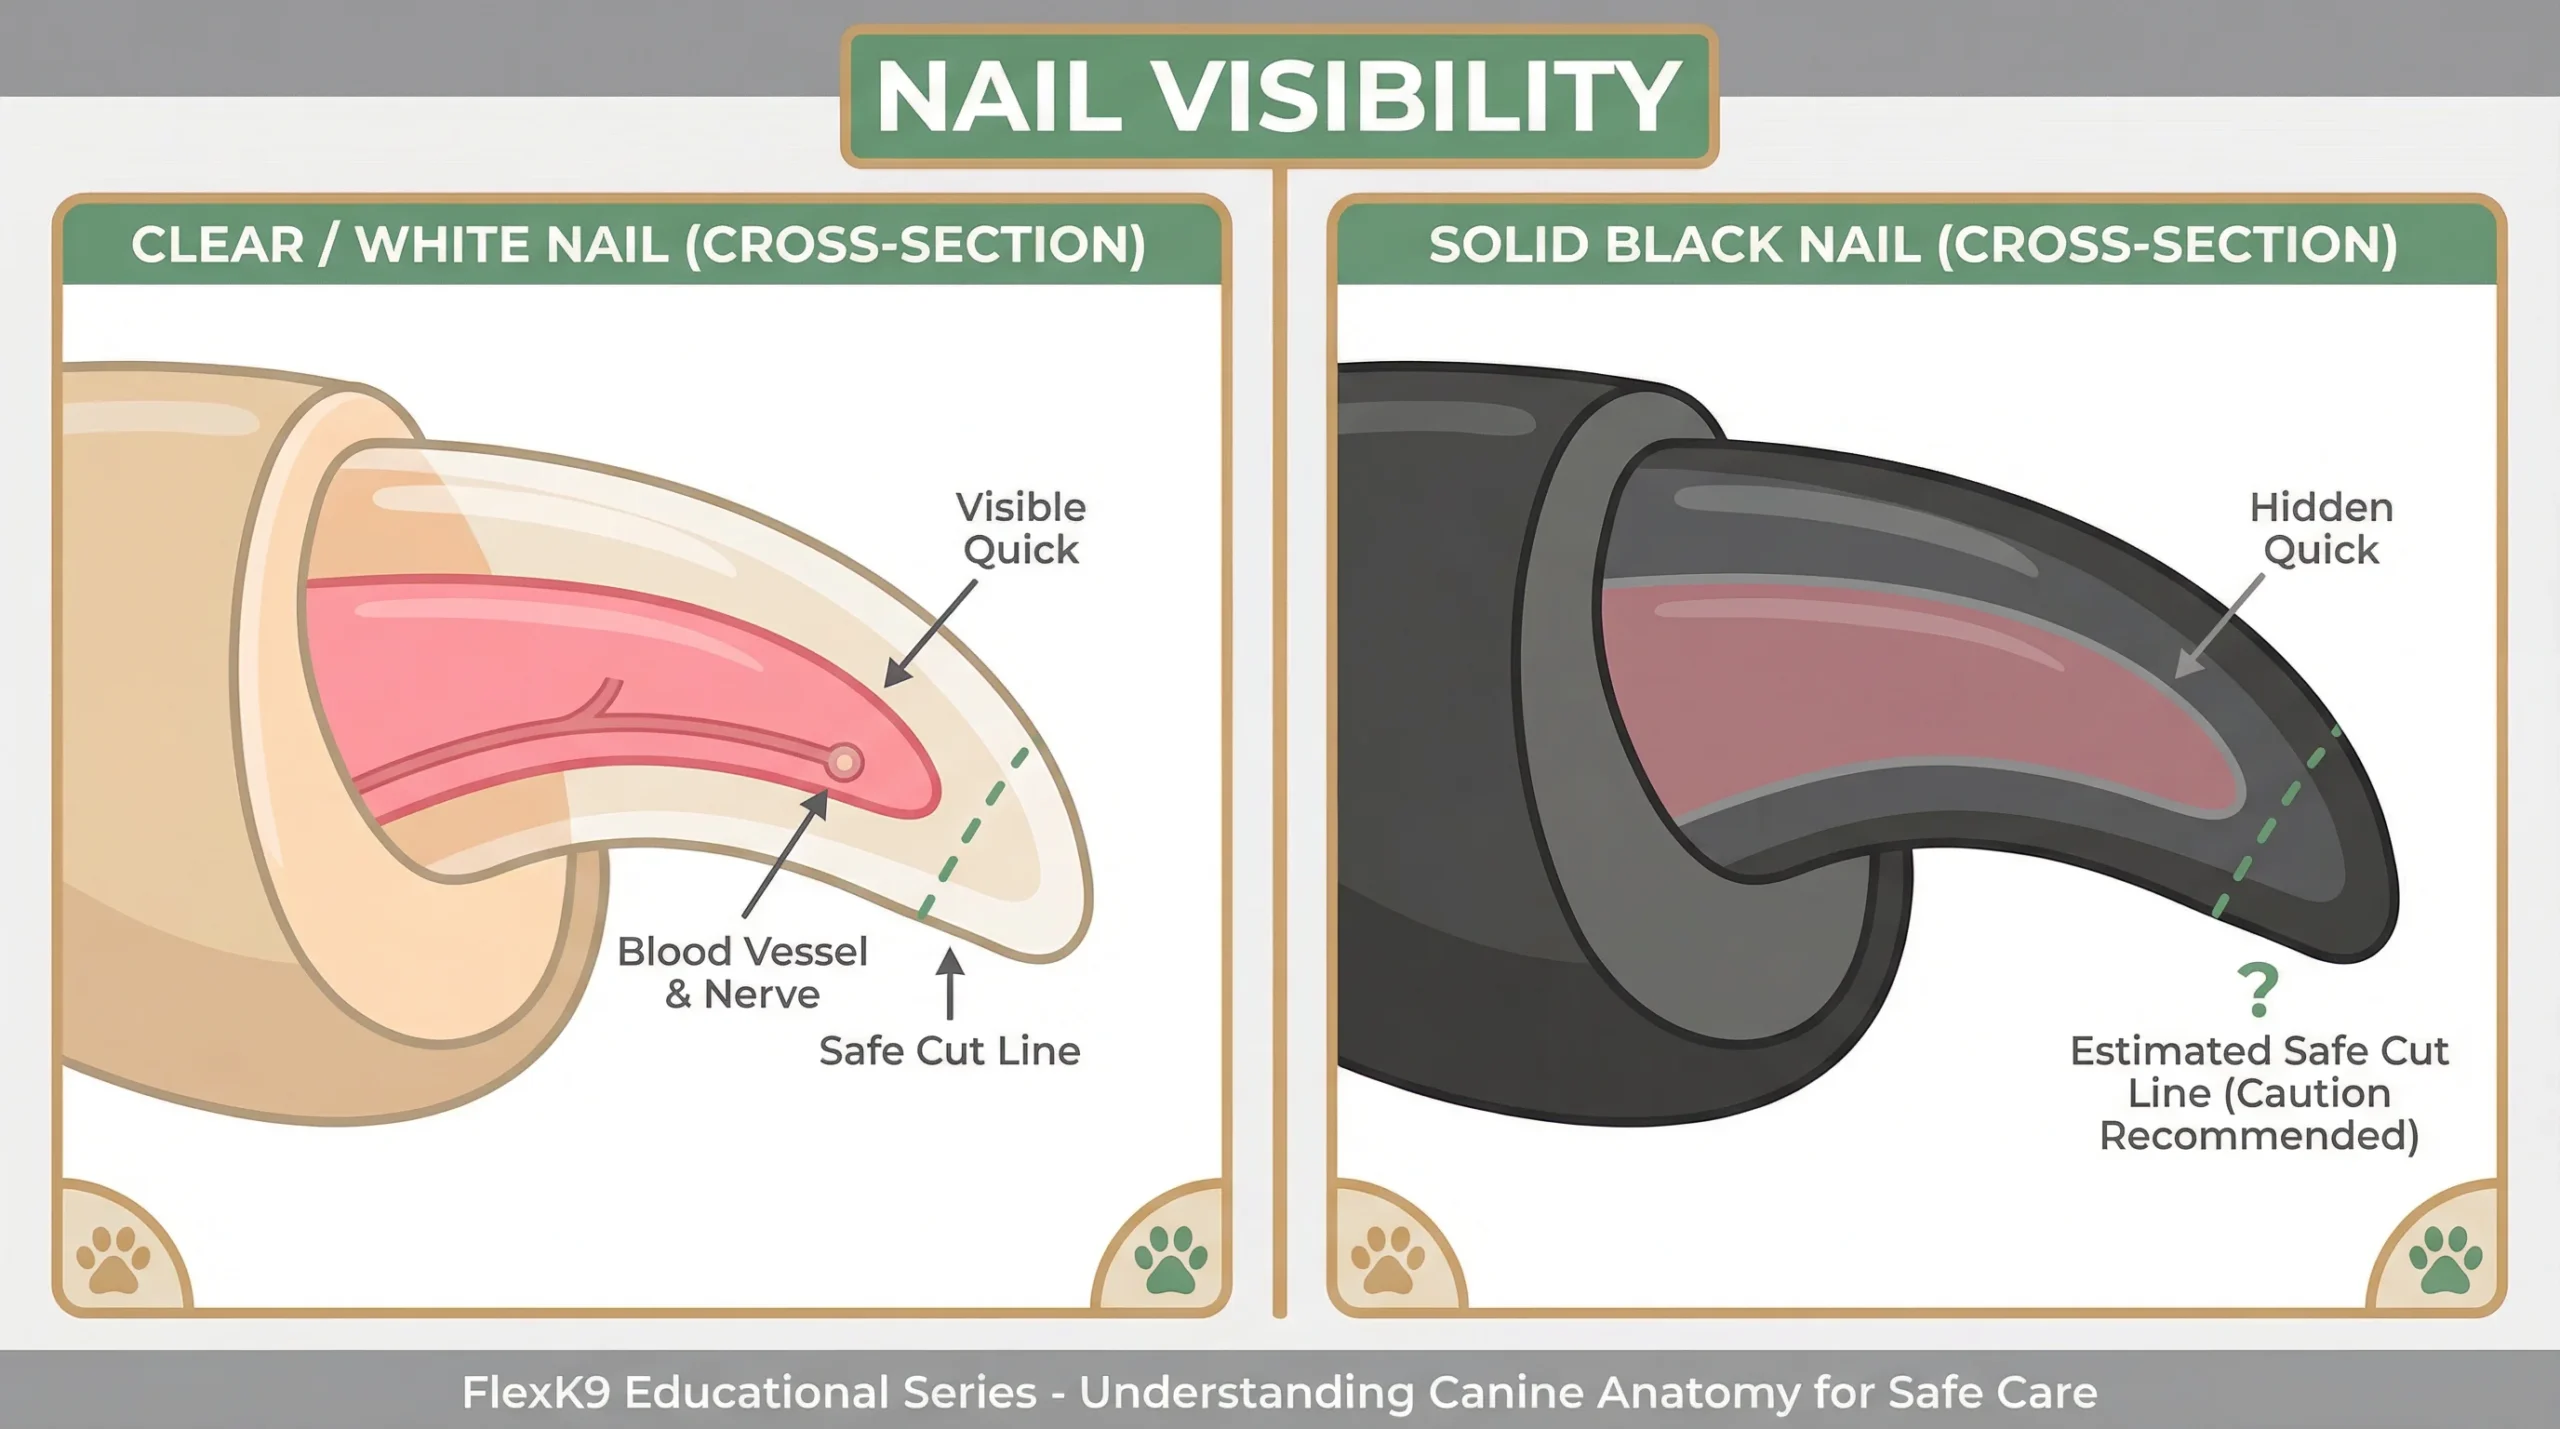
A dog’s nail has two main parts:
- Outer shell – hard keratin, similar to human fingernails
- Quick – soft tissue containing blood vessels and nerves
Cutting into the quick causes pain and bleeding. Because black nails obscure the quick, visual cues become essential when trimming.
What You Need Before Cutting Black Dog Nails
Preparation matters more with black nails than any other type.
Essential Tools
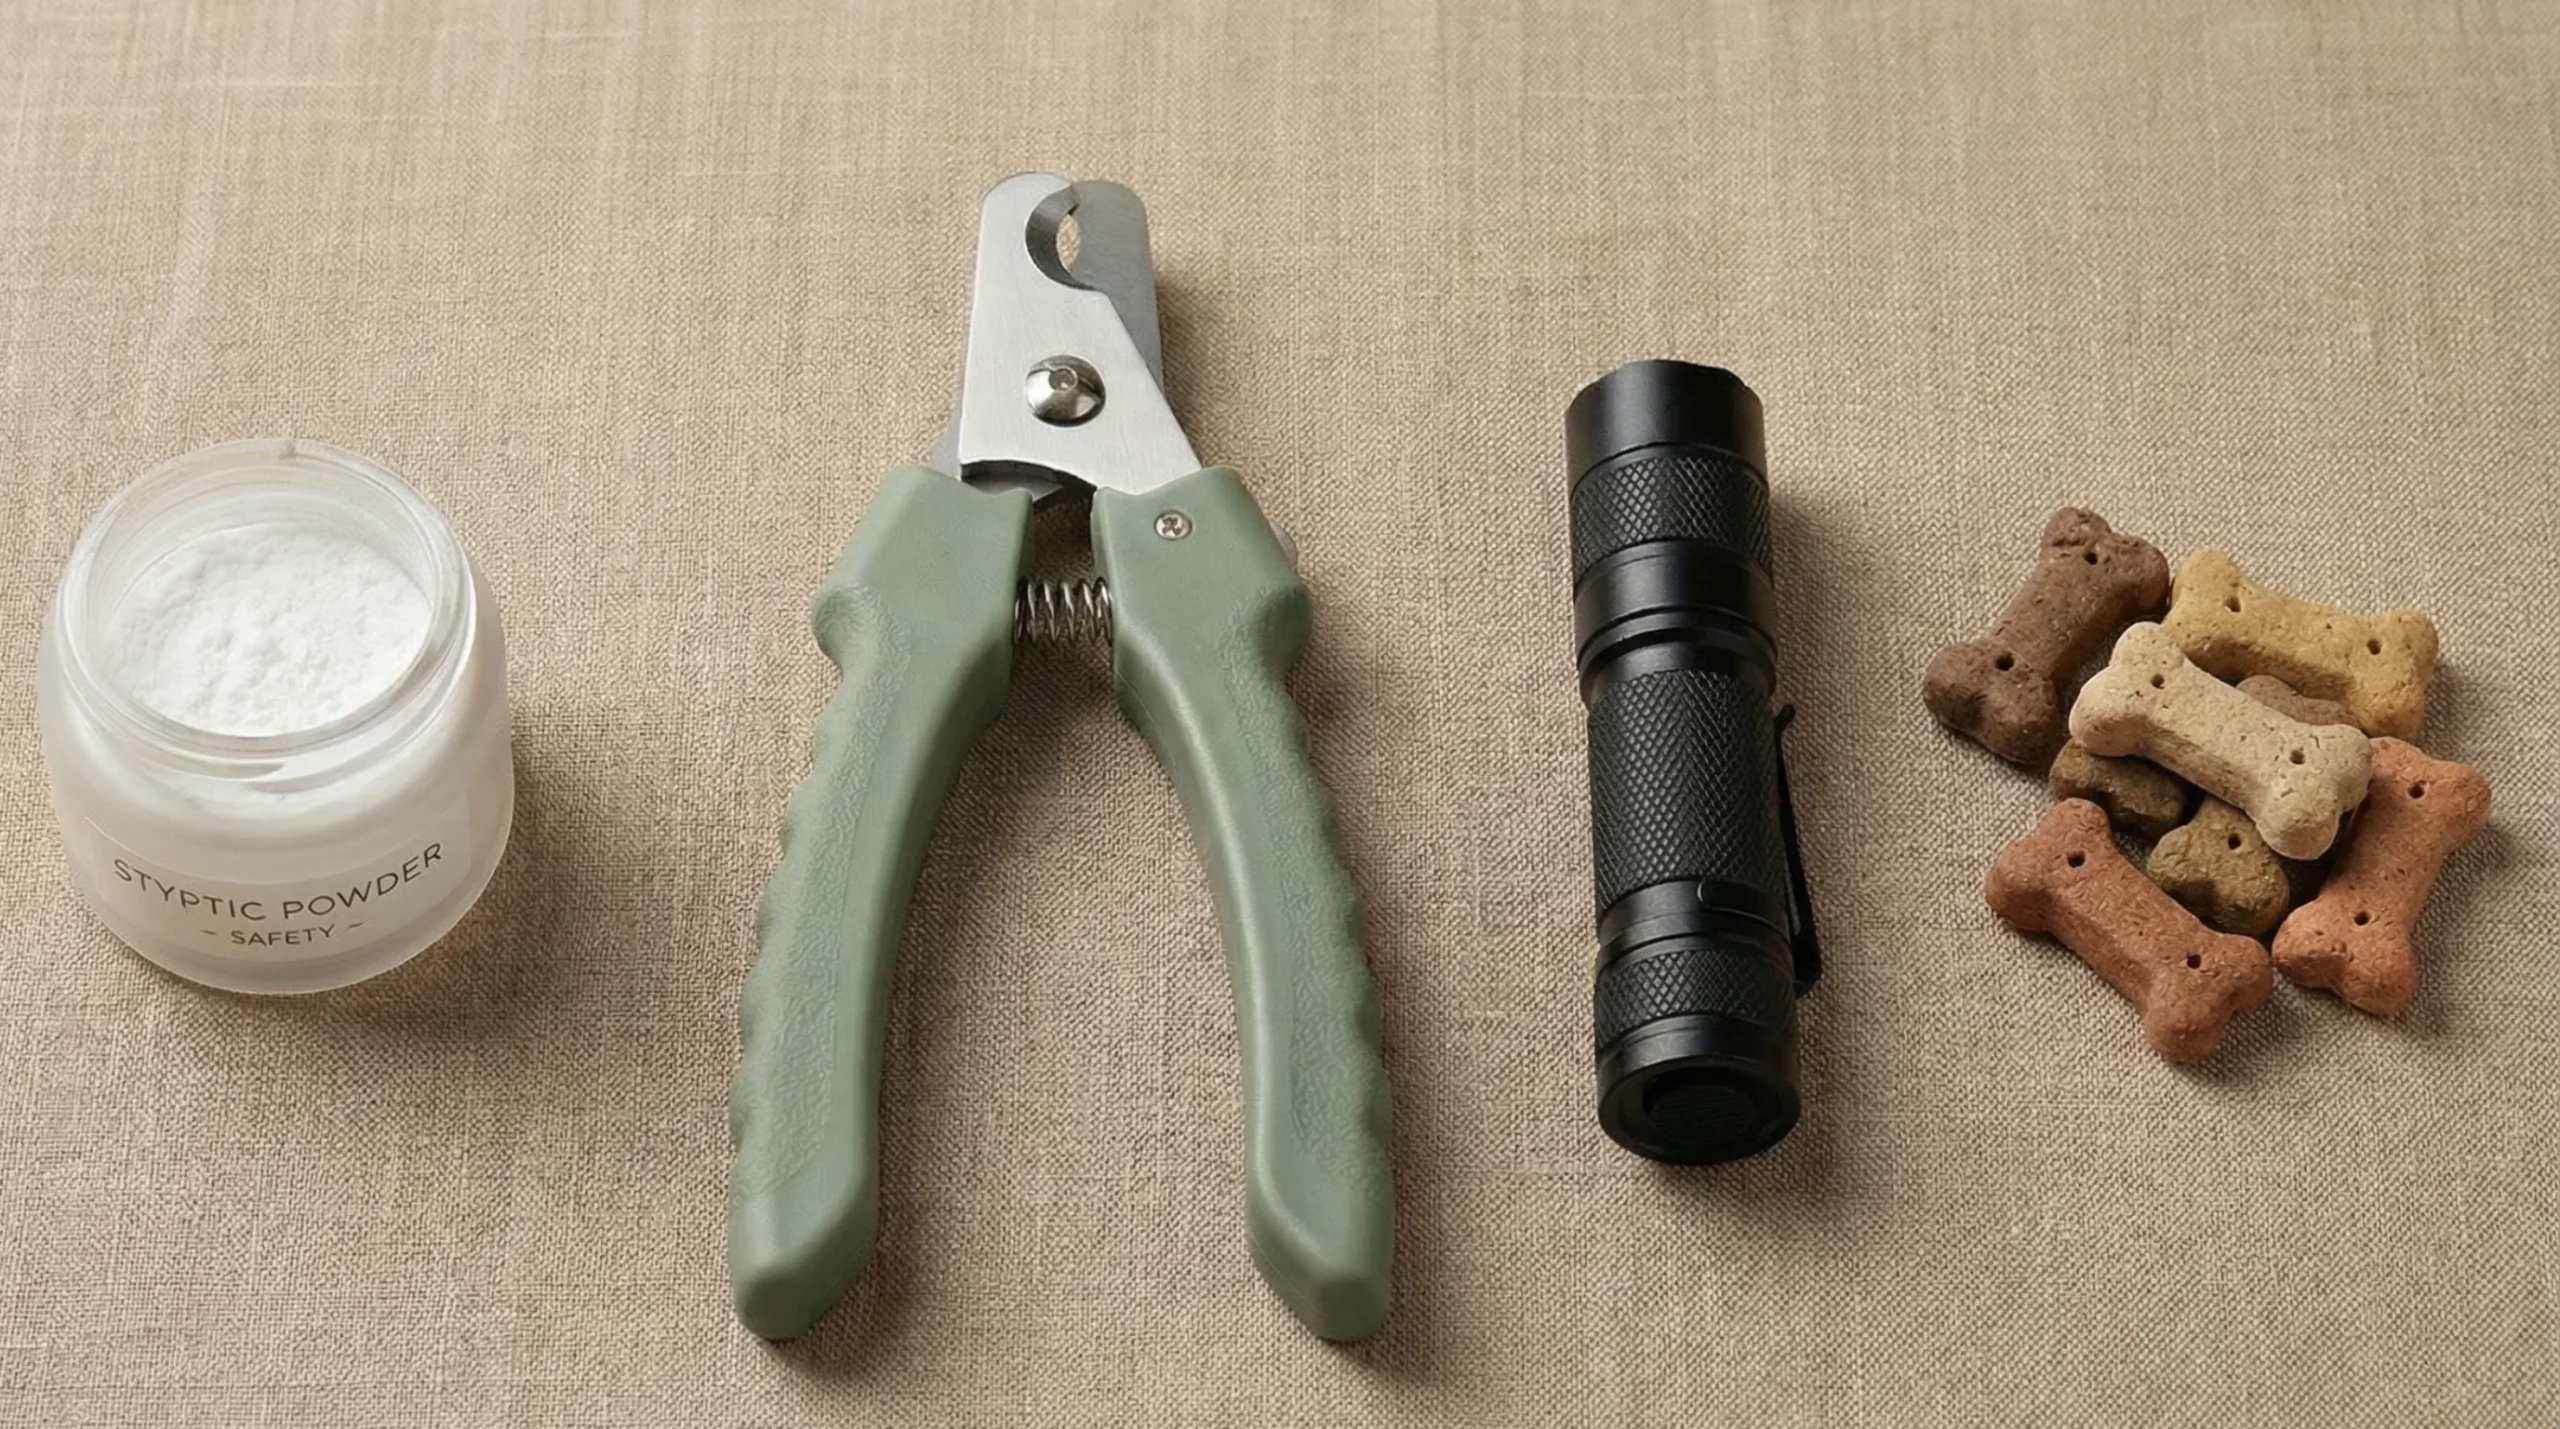
- Sharp dog nail clippers (guillotine or scissor style)
- Styptic powder or cornflour (in case of bleeding)
- Nail grinder or file (optional but helpful)
- Treats for positive reinforcement
Create a Calm Environment
- Choose a quiet room with good lighting
- Trim after exercise, when your dog is relaxed
- Ask someone to help hold your dog if needed
How to Cut Dog Nails That Are Black: Step-by-Step
Step 1: Position Your Dog Correctly
Have your dog sit or lie comfortably. Hold the paw firmly but gently, ensuring you can clearly see the nail from the side.
Step 2: Identify the Safe Cutting Area
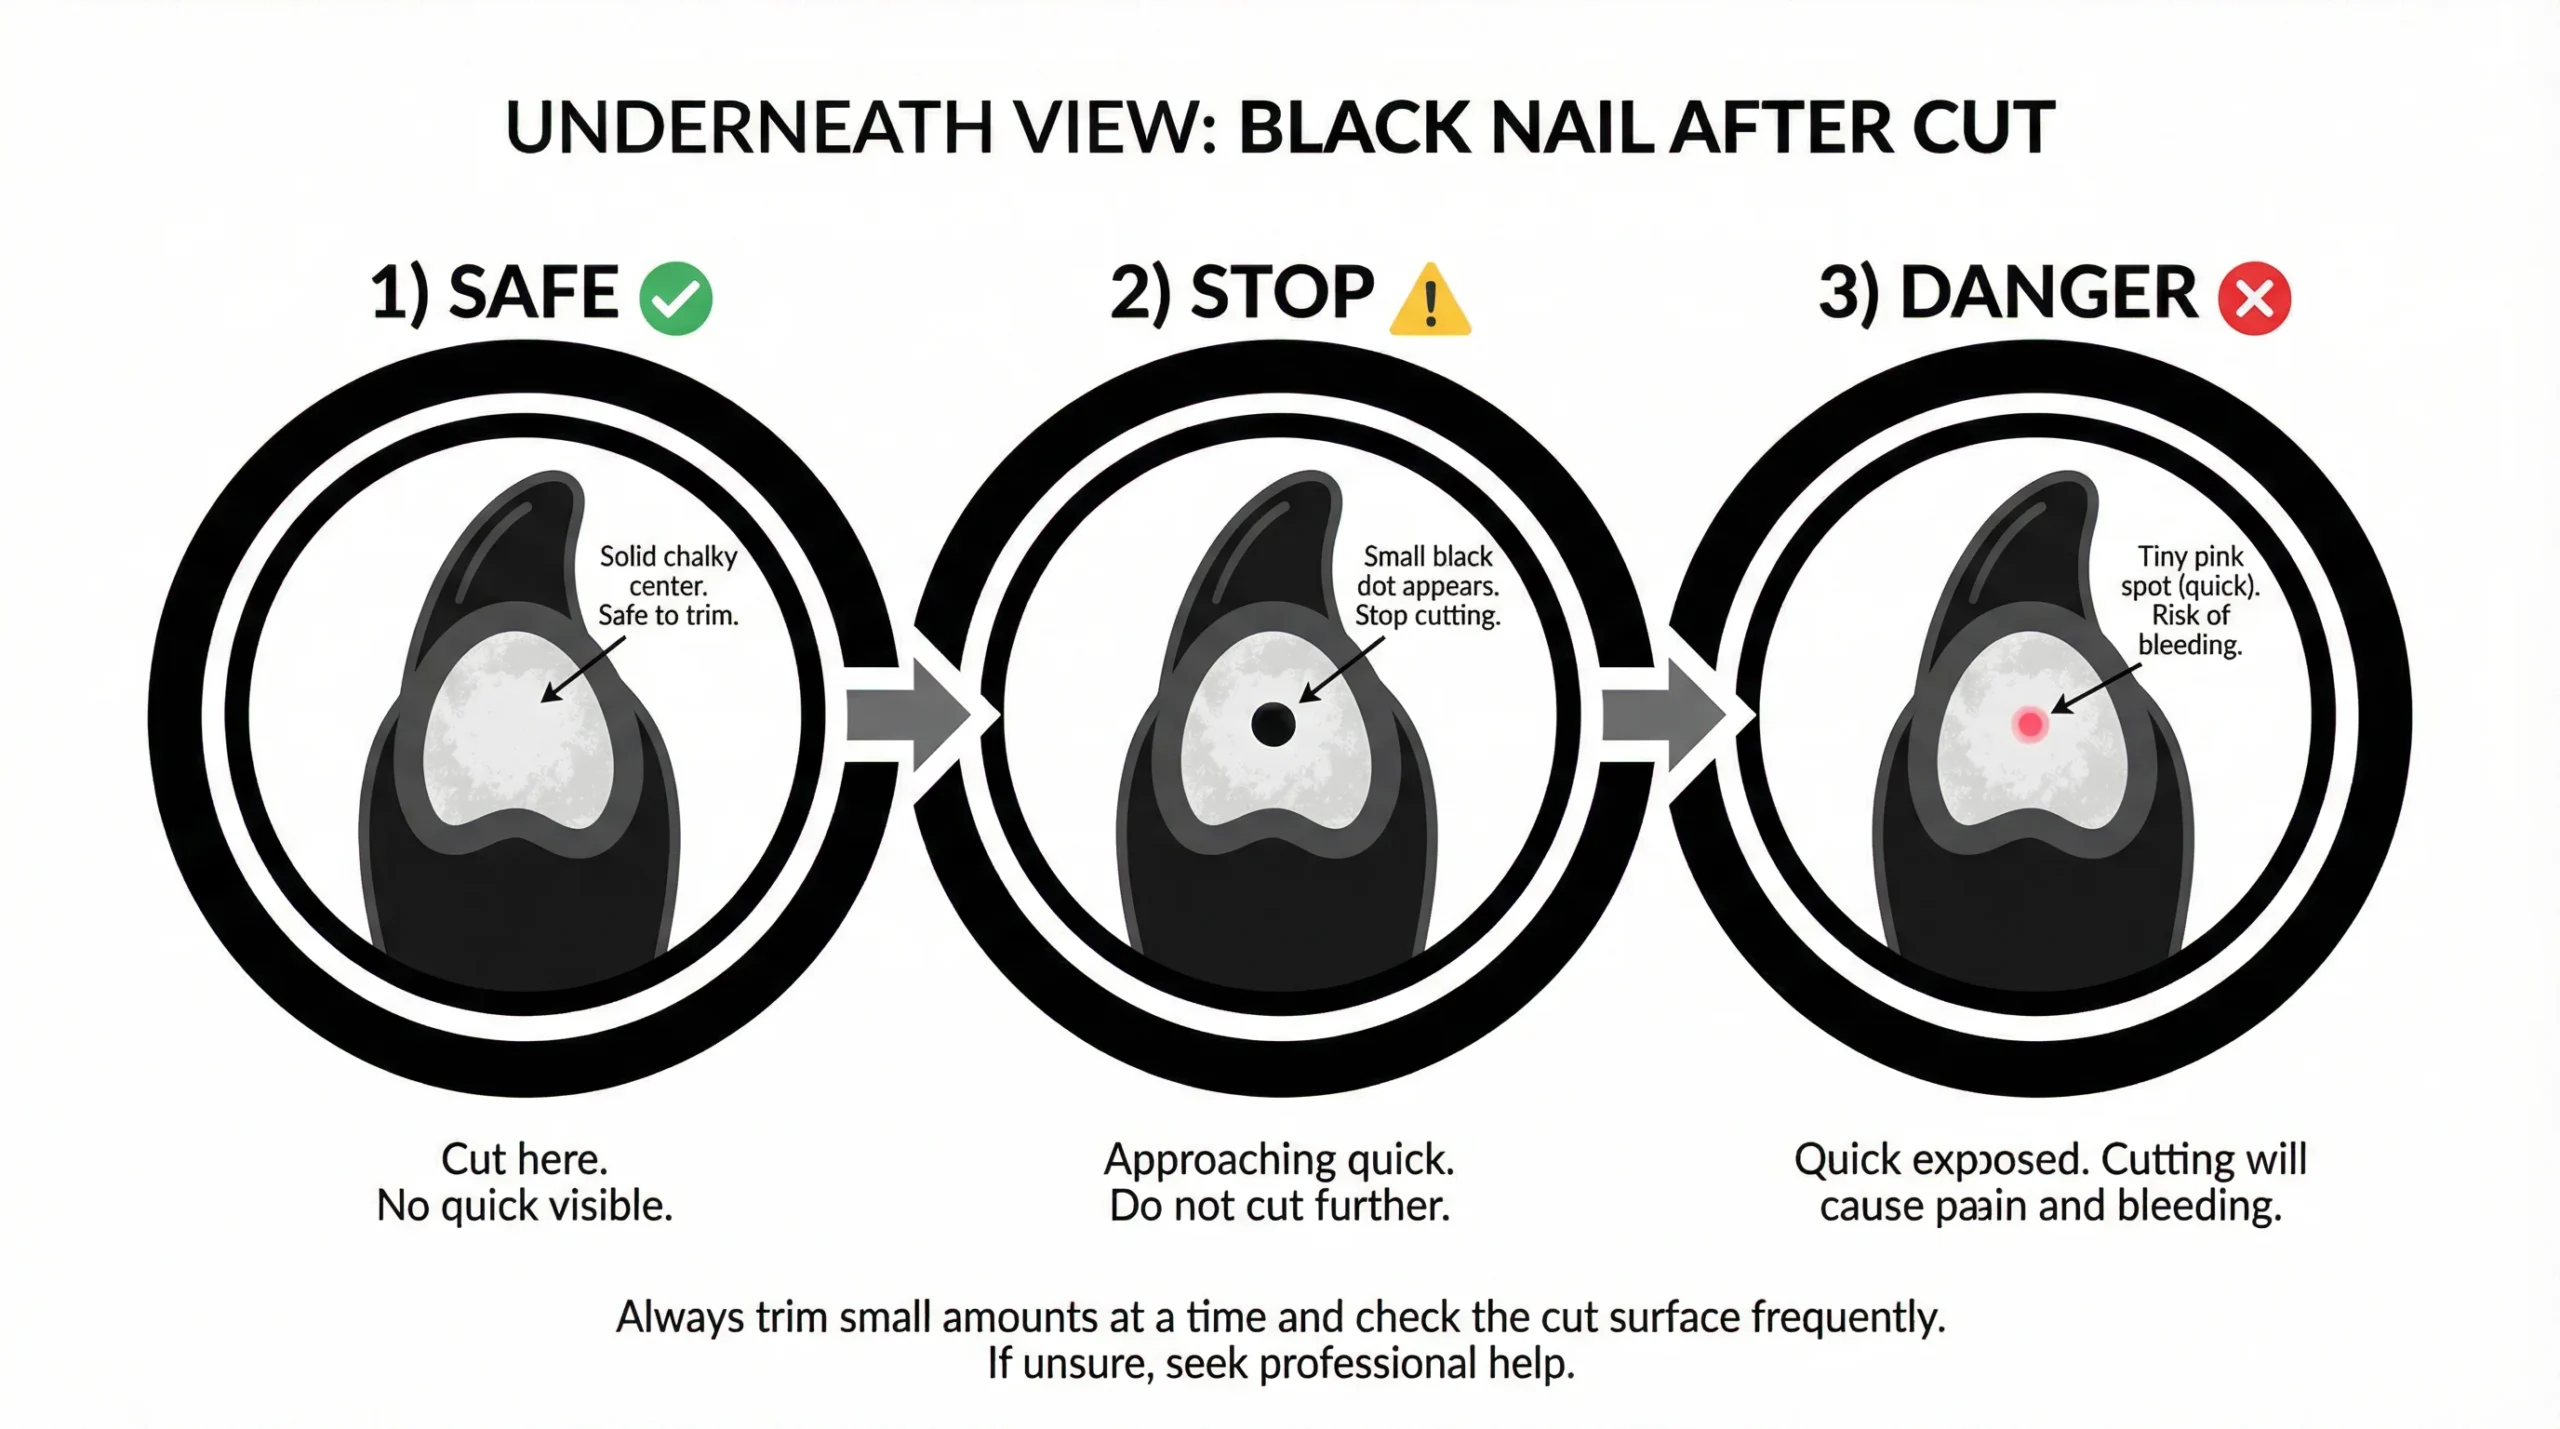
Look at the nail tip. As you trim, the centre of the nail will change:
- White or grey centre → safe to continue
- Dark dot or oval → stop immediately
- Pink tissue → you’re at the quick
This visual cue is critical when cutting black nails.
Step 3: Trim Small Amounts Only
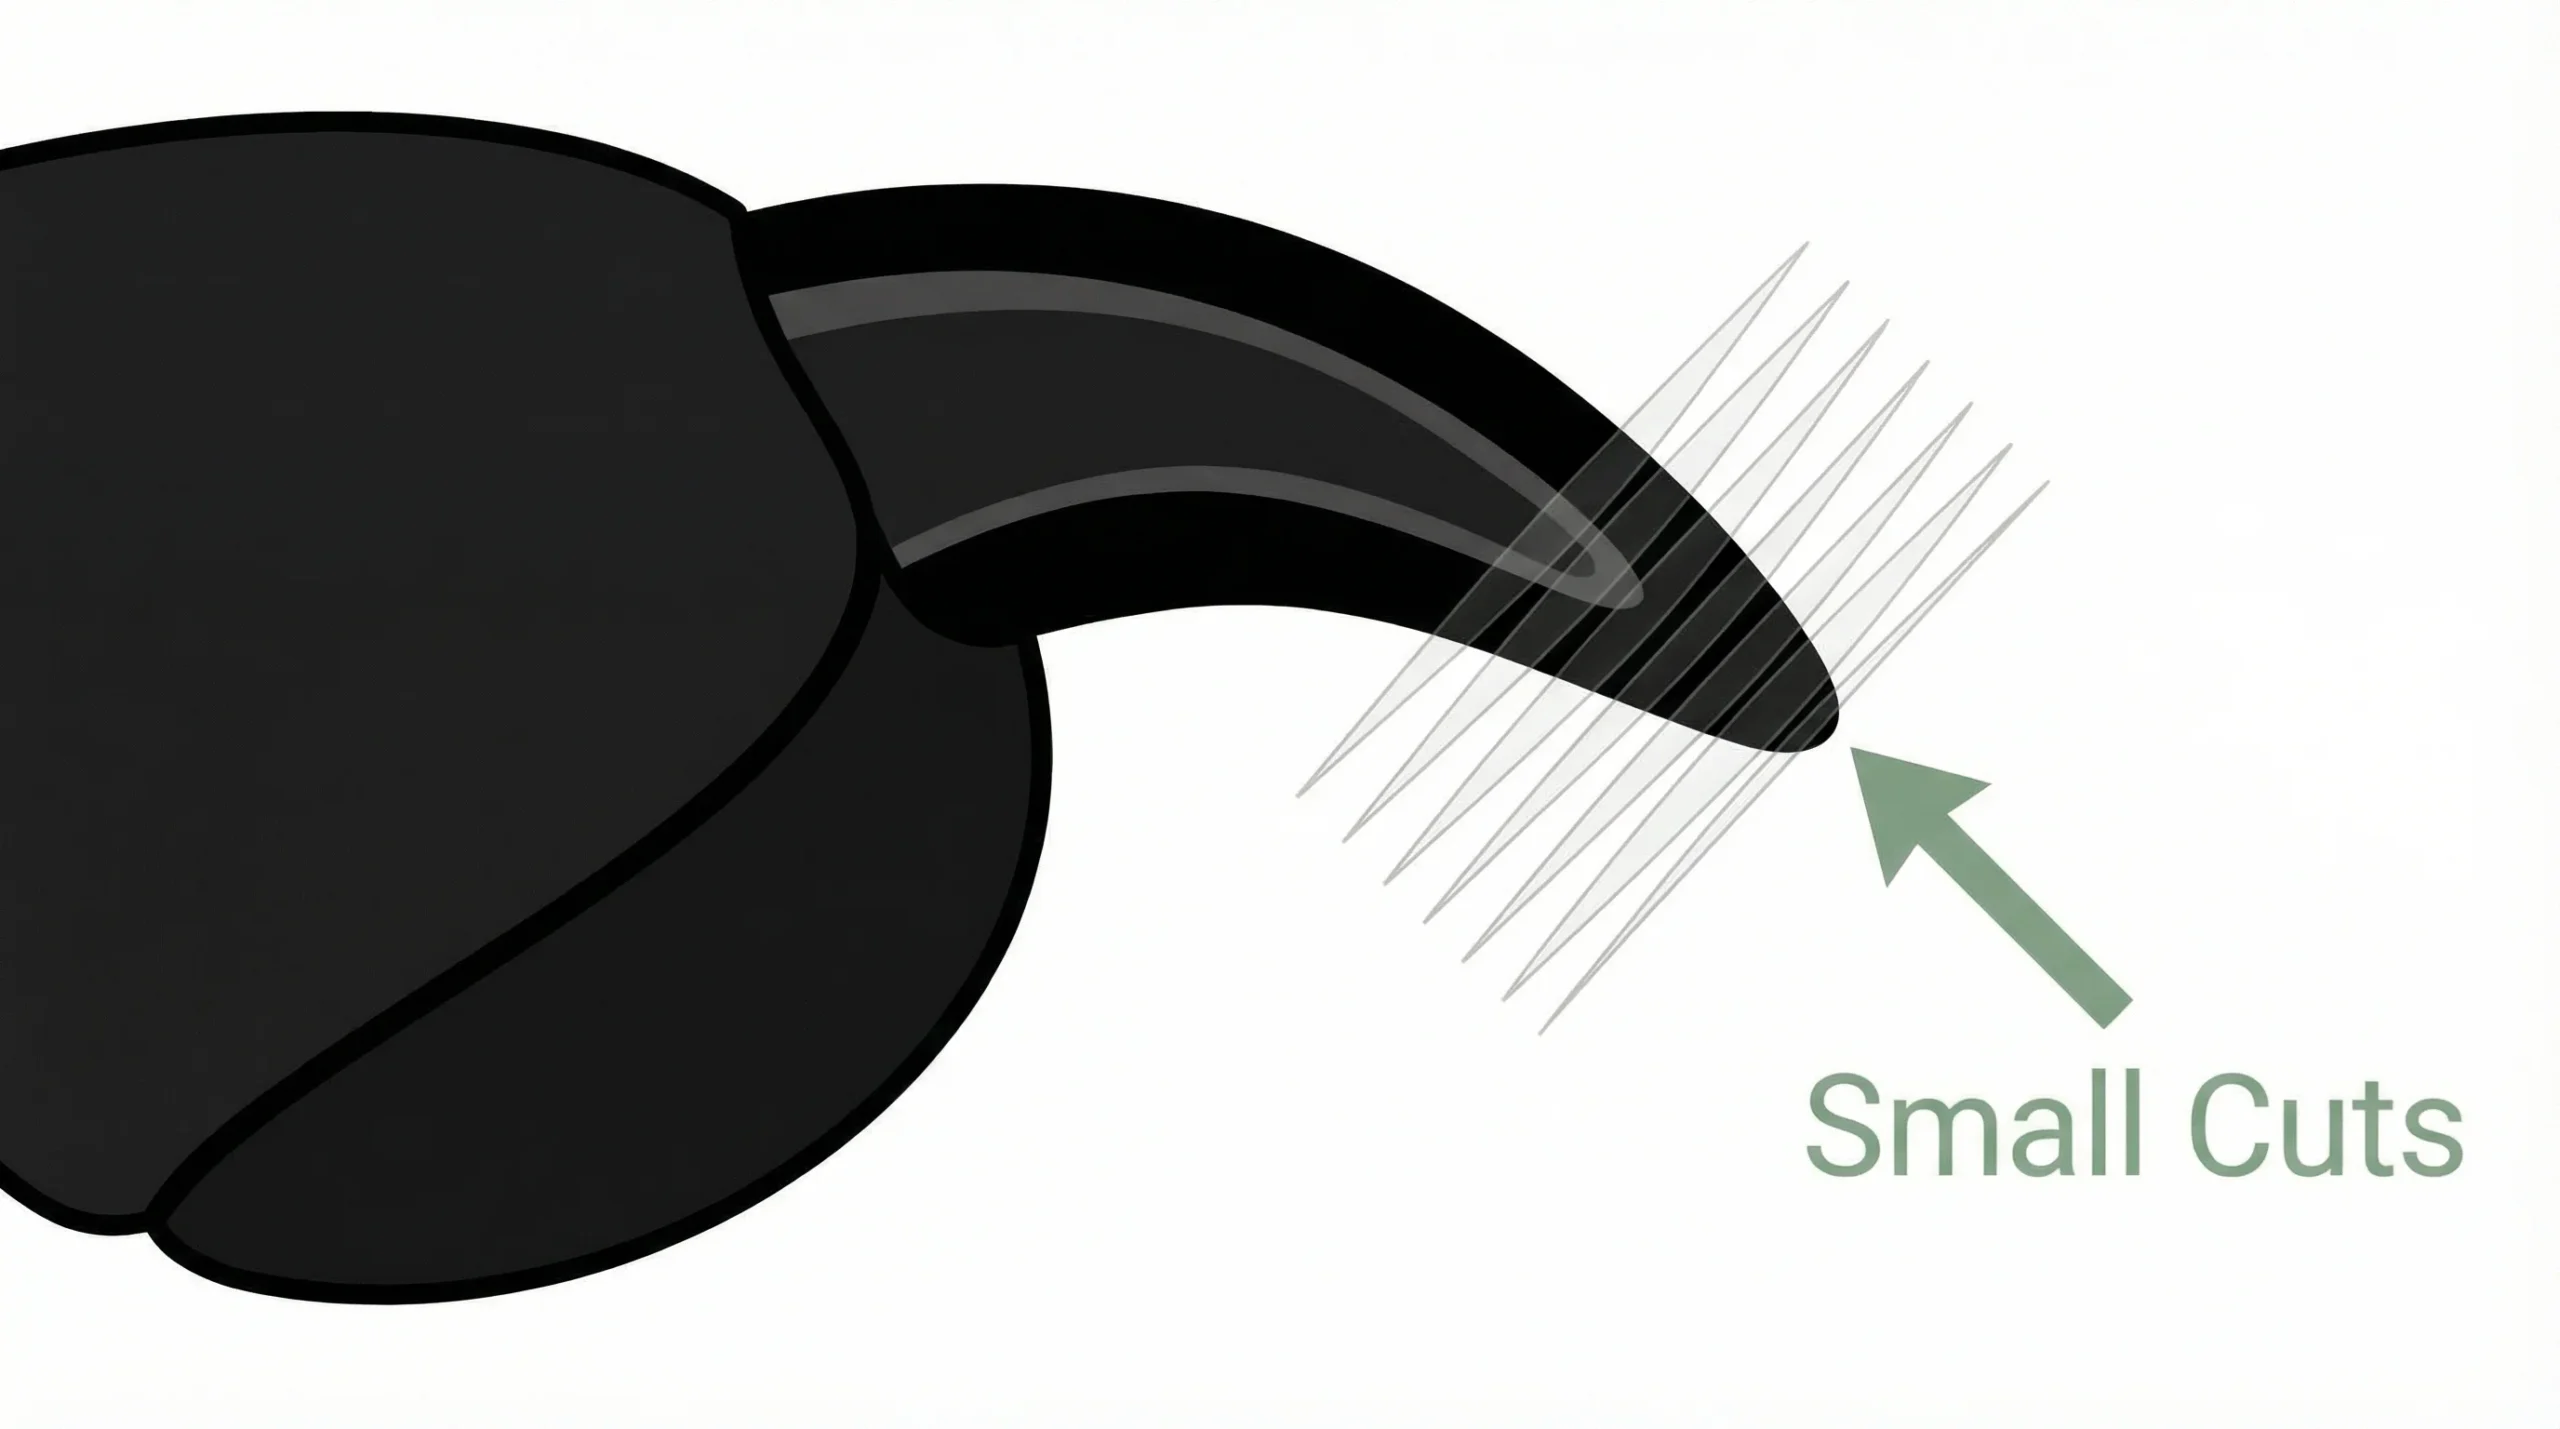
Cut 1–2 mm at a time at a 45-degree angle. Never attempt to remove large sections in one cut.
If unsure, stop. You can always trim more later. For additional vet-approved guidance on trimming dog nails safely, including when the quick is difficult to see, you can refer to advice from Vets4Pets.
Step 4: Smooth the Edges
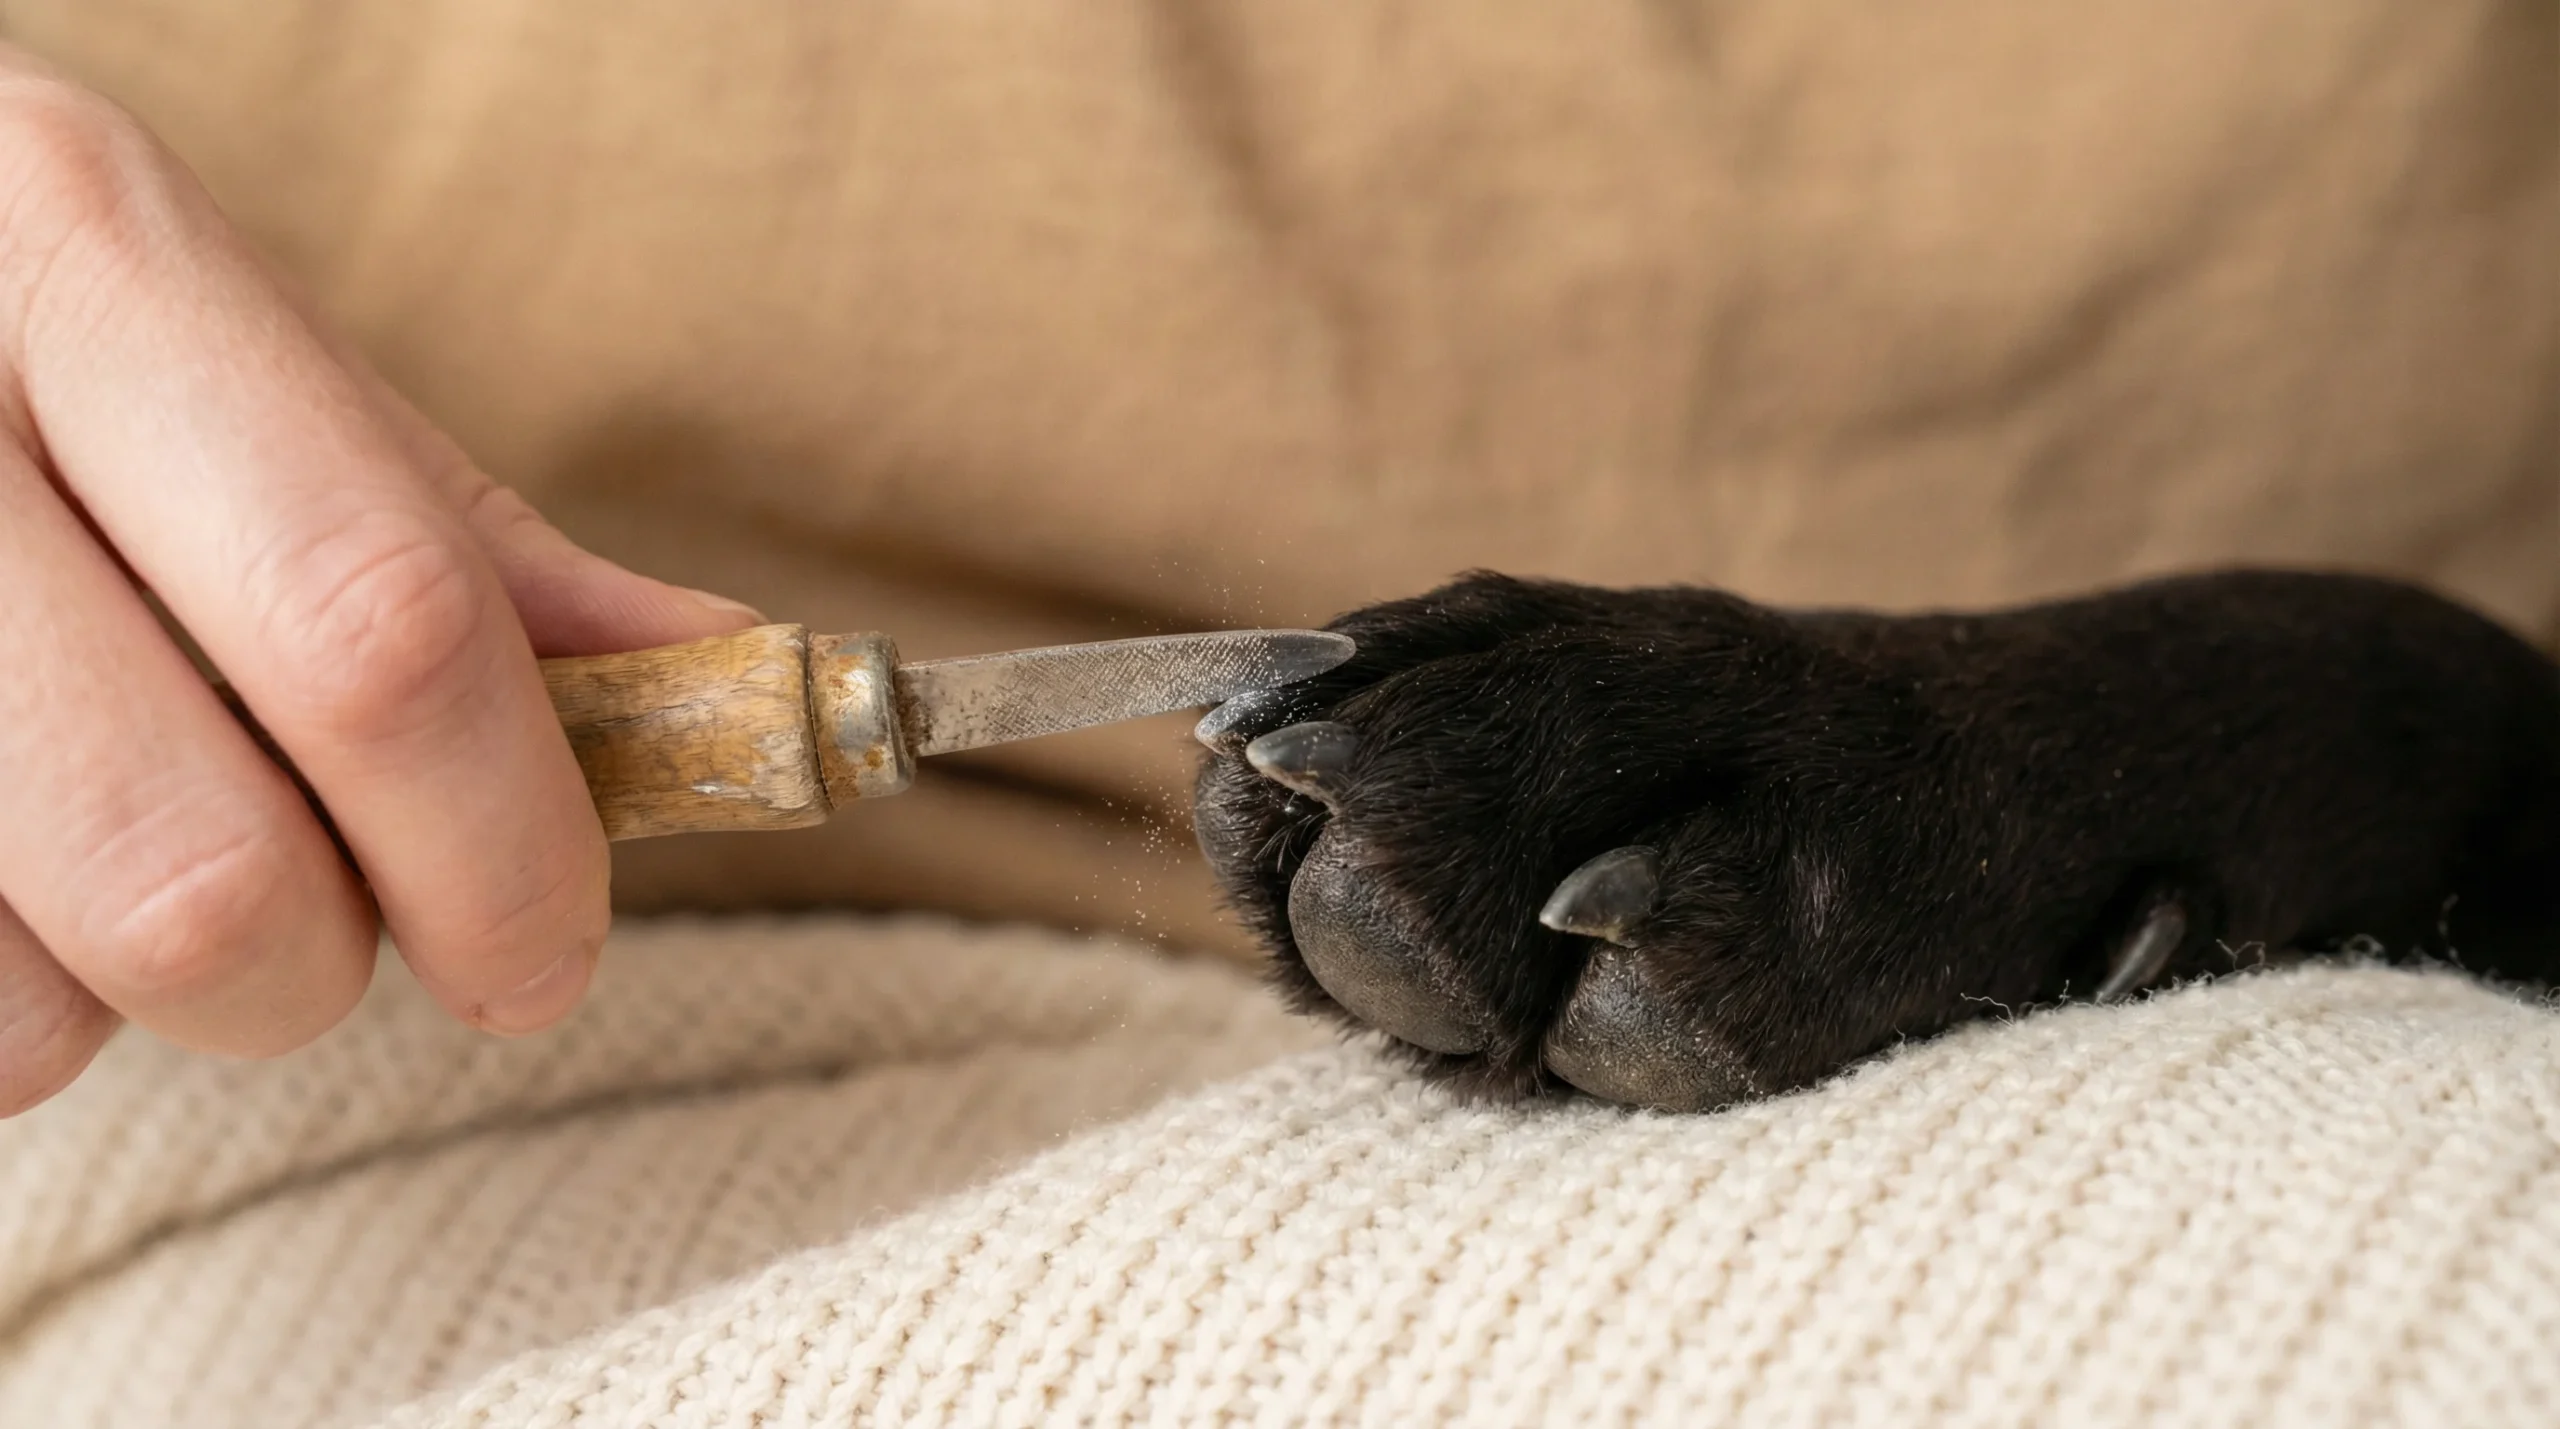
Use a nail file or grinder to smooth sharp edges. This also helps reduce the risk of splintering and gives you better control near the quick.
Can You Use a Nail Grinder Instead of Clippers?
Yes. Nail grinders are often safer for black dog nails because they remove material gradually. They also reduce the chance of cutting the quick suddenly.
However:
- Some dogs dislike the noise or vibration
- Grinding takes longer than clipping
For nervous owners, grinders are often the safer option.
Is It Safe to Cut Black Dog Nails at Home?
Yes — if:
- Your dog is calm and cooperative
- You trim small amounts
- You understand the visual cues
- You stop before reaching the quick
You should not trim at home if:
- Your dog is aggressive or highly anxious
- Nails are severely overgrown and curling
- There is an active infection or injury
In these cases, consult a professional groomer or vet.
What to Do If You Cut the Quick on Black Nails
Accidents happen — even professionals hit the quick occasionally.
If Bleeding Occurs:
- Stay calm and reassure your dog
- Apply styptic powder with gentle pressure
- Hold for 10–20 seconds
- Prevent licking until bleeding stops
If bleeding doesn’t stop within 5 minutes, contact your vet. If bleeding occurs, follow our step-by-step guide on how to stop a dog’s nail from bleeding to control it quickly and prevent further discomfort.
Aftercare Tips After Cutting Black Dog Nails

- Reward your dog with treats and praise
- Check nails for rough edges
- Avoid outdoor activity for 30 minutes if the quick was nicked
- Monitor for limping or sensitivity
Regular trims make the quick recede over time, making future trims safer.
How Often Should You Cut Black Dog Nails?
Most dogs need their nails trimmed every 3–4 weeks. Dogs who walk frequently on pavement may need it less often.
If you can hear clicking on hard floors, it’s usually a sign that it’s time to clip your dogs nails to prevent discomfort and posture issues.
Common Mistakes to Avoid
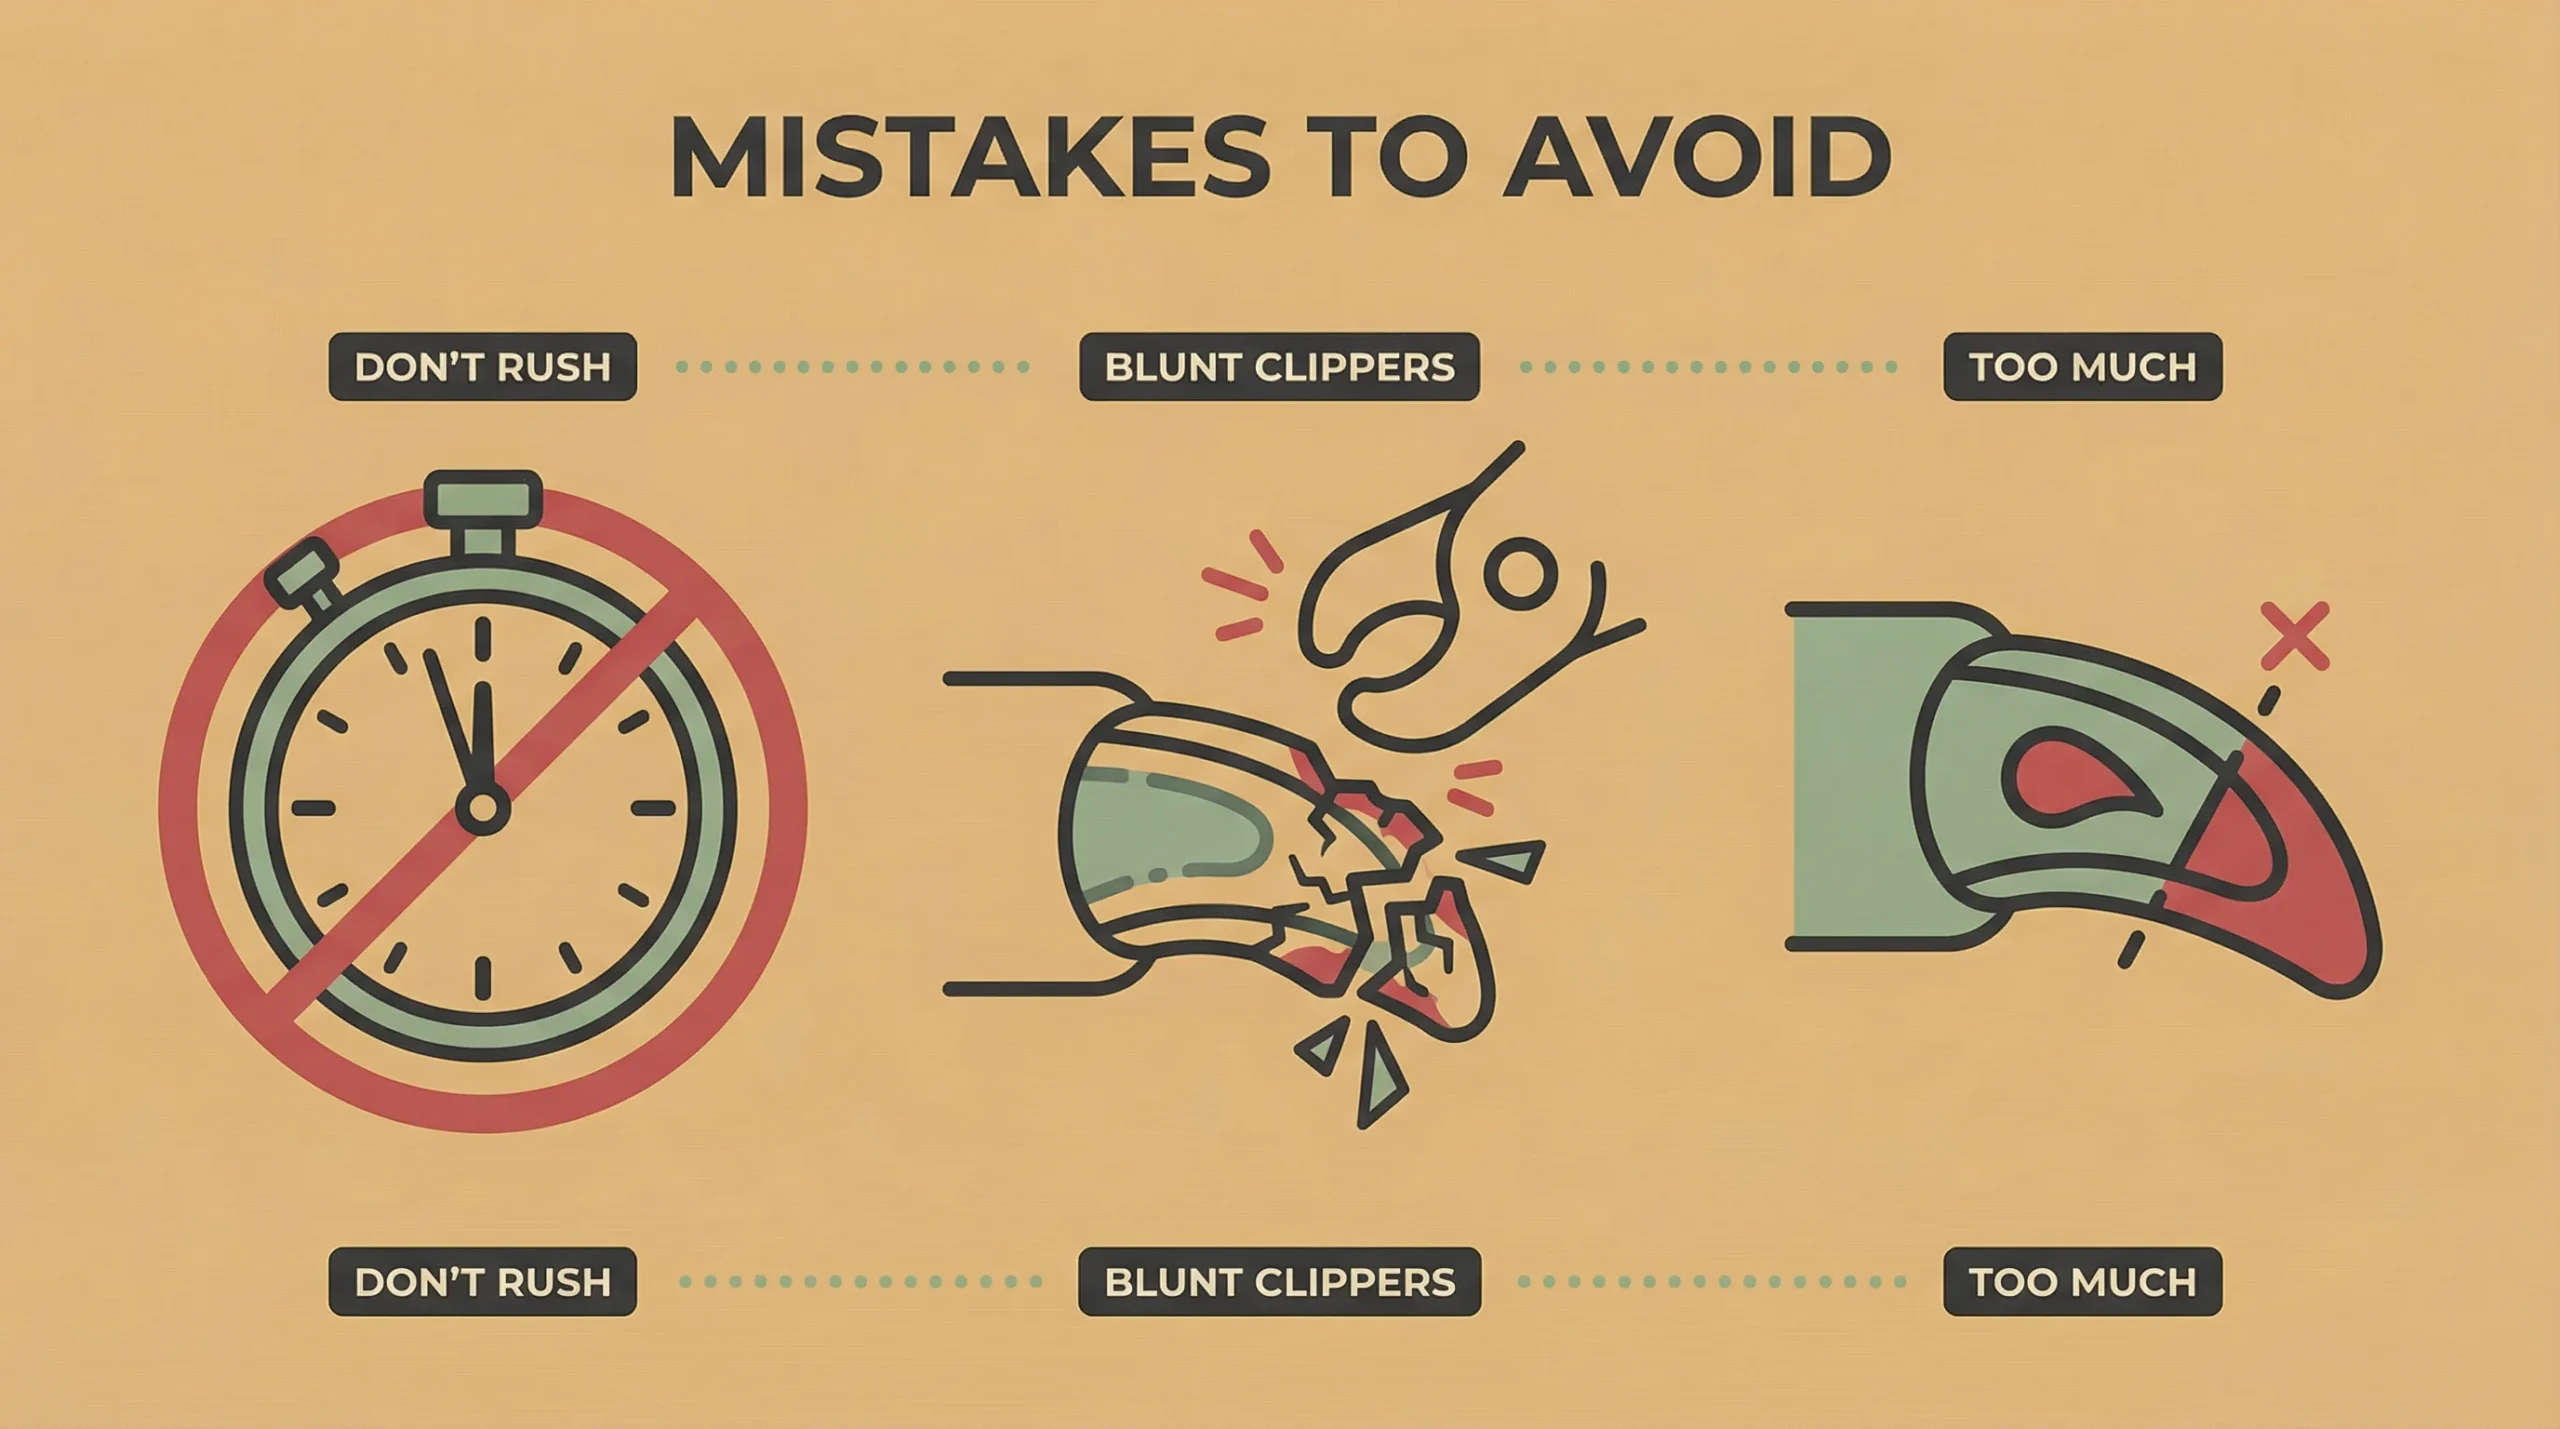
- Cutting too much at once
- Using blunt clippers
- Rushing the process
- Trimming when your dog is stressed
- Ignoring early warning signs of the quick
Patience matters more than speed.
Final Verdict
Learning how to cut dog nails that are black is about technique, not bravery. By trimming slowly, watching for visual cues, and keeping the right tools on hand, you can safely maintain your dog’s nails at home without stress or injury.
If you’re ever unsure — stop. Nail trimming should never feel like a gamble.
Frequently Asked Questions
How can you tell where the quick is on black dog nails?
To locate the quick on black dog nails, hold the paw gently and examine the underside of the nail. Look for a visible change in the colour of the nail; the quick is generally a darker area closer to the paw. Trim small amounts of the nail gradually, stopping before reaching the quick. If the quick is accidentally cut, use styptic powder to stop the bleeding.
Can you cut a dog’s nail if it’s black?
Yes, you can cut a dog’s nail if it’s black, but be cautious. Trim small amounts at a time to avoid cutting into the quick, which may not be visible in black nails. Use a nail clipper designed for dogs and consider using a file for smoothing edges. If unsure, consult a veterinarian or a professional groomer.
What angle do you cut black dog nails?
Cut black dog nails at a 45-degree angle, aiming to avoid the quick.
What tool is used to cut black dog nails?
A nail clipper or nail grinder specifically designed for dogs is used to cut black dog nails.
Is it better to clip or grind black dog nails?
Grinding is often safer for black dog nails because it removes material gradually and reduces the risk of suddenly cutting into the quick. Clippers are faster but require more precision, especially when the quick is hidden.
Why does my dog pull away when I clip black nails?
Dogs may pull away because black nails are more sensitive near the quick or due to previous painful experiences. Trimming small amounts, using treats, and keeping sessions short can help reduce fear and resistance over time.
Can overgrown black nails cause pain or walking problems?
Yes. Overgrown black nails can change how your dog walks, put pressure on joints, and increase the risk of nail splitting or breaking. Regular trimming helps maintain proper posture and comfort.
Should I cut black dog nails in one session or over time?
It’s usually safer to cut black dog nails over multiple short sessions. Trimming small amounts every few days allows the quick to recede gradually and reduces the chance of bleeding.
When should I stop trimming and seek professional help?
You should stop trimming and seek a groomer or vet if your dog becomes aggressive or highly stressed, if the nails are severely overgrown or curling, or if bleeding does not stop after applying styptic powder.

